Sunday, December 18, 2011
Christmas Cupcakes
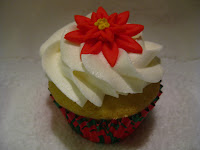
These are just dark chocolate and vanilla cupcakes with butter cream icing and a fondant poinsettia.
Sunday, December 11, 2011
Gingerbread Play-dough
While the cookies were baking, Bella and I made Gingerbread Play-dough. Another great recipe from Sweet Sugarbelle.
Gingerbread Play-dough
1 cup all purpose flour
1/2 cup salt
2 tsp cream of tartar
1 Tbsp ground cinnamon
2 tsp ground ginger
1 tsp ground nutmeg
1 tsp ground cloves
2 Tbsp vegetable oil
1 cup water
1 tsp orange extract (optional, I used vanilla)
In a medium saucepan whisk together dry ingredients. Next mix in the water, oil and extract until a thick batter is formed. Cook on low-medium heat until a thick dough forms. Turn out onto parchment paper and knead until smooth. Makes about 2 cups of dough.
Bella had so much fun playing with this. It is smooth and soft like cookie dough and less like the store bought play-dough, which is nice. She felt like she was baking at the kitchen counter and not so much playing. Also, if she cuts out shapes we can let them dry and make them into ornaments.
I might try different spices for different times of year. Apple pie spice and pumpkin pie spice. A good suggestion was to use expired spices for this.
White Velvet Cutouts
This week Bella and I made cutout cookies for Christmas. I found this recipe in a little booklet called Cookies for Christmas from Taste of Home Books (2001). I liked this cookie so much that I made the recipe part of our wedding favors 5 1/2 years ago. They were recipe cards with a heart shaped cookie cutter attached with a ribbon. Anyway, back to the cookie.
2 cup of butter, softened
1 package (8 ounces) cream cheese, softened
2 cups sugar
2 egg yolks
1 tsp vanilla extract
4 1/2 cups all purpose flour
(I used royal icing to decorate.)
In a mixing bowl, cream butter and cream cheese until light and fluffy. Add sugar, egg yolks and vanilla; mix well. Gradually add flour. Cover and chill 2 hours or until firm. Roll out on a floured surface 1/4 inch thick. Cut into 3 inch shapes and place 1 inch apart on a greased baking sheet. Bake at 350 for 10-12 minutes or until set, but not browned. Cool 5 minutes before removing to wire racks to cool. Frost as desired.
A few notes, this is a lot of dough. It completely filled my mixer, so I might halve it next time. It is also a really sticky dough to begin with so it has to be chilled. However, I split mine into 2 and wrapped in plastic wrap before chilling. It takes up less space in the fridge and isn't a bear to get out of the bowl once its chilled. Let the chill come off before trying to roll out. It is sticky enough to allow for the addition of flour in rolling. These cookies are amazing.
I will post pictures as soon as I can.
White Velvet Cutouts
Makes about 7 dozen
2 cup of butter, softened
1 package (8 ounces) cream cheese, softened
2 cups sugar
2 egg yolks
1 tsp vanilla extract
4 1/2 cups all purpose flour
(I used royal icing to decorate.)
In a mixing bowl, cream butter and cream cheese until light and fluffy. Add sugar, egg yolks and vanilla; mix well. Gradually add flour. Cover and chill 2 hours or until firm. Roll out on a floured surface 1/4 inch thick. Cut into 3 inch shapes and place 1 inch apart on a greased baking sheet. Bake at 350 for 10-12 minutes or until set, but not browned. Cool 5 minutes before removing to wire racks to cool. Frost as desired.
A few notes, this is a lot of dough. It completely filled my mixer, so I might halve it next time. It is also a really sticky dough to begin with so it has to be chilled. However, I split mine into 2 and wrapped in plastic wrap before chilling. It takes up less space in the fridge and isn't a bear to get out of the bowl once its chilled. Let the chill come off before trying to roll out. It is sticky enough to allow for the addition of flour in rolling. These cookies are amazing.
I will post pictures as soon as I can.
Wednesday, November 30, 2011
60th Birthday Party Cut Out Cookies
I have been really excited to share these cookies with you. I got the recipe from a blog that I follow (which I need to add to my list).
Anyway, moving on. I found the generic birthday party cutters, but I really wanted something special for my Dad's 60th birthday. So, I went to the local cake store. I found a beer glass, a milk bottle and a wine bottle. The wine bottle turned into a beer bottle with a little icing and the milk bottle turned upside down and into a better beer glass than the real beer glass. (I couldn't find a beer mug.)
The royal icing recipe I found at BakeAt350
4 TBSP meringue powder
scant 1/2 c. water
1 lb. powdered sugar
1/2 - 1 tsp light corn syrup
few drops clear extract (optional)

Combine the meringue powder and water. With the paddle attachment of an electric mixer, beat until combined and foamy.
Sift in the powdered sugar and beat on low to combine. (Do NOT skip the sifting!)
Add in the corn syrup and extract if desired. ( I think the corn syrup helps keep the icing shiny.)
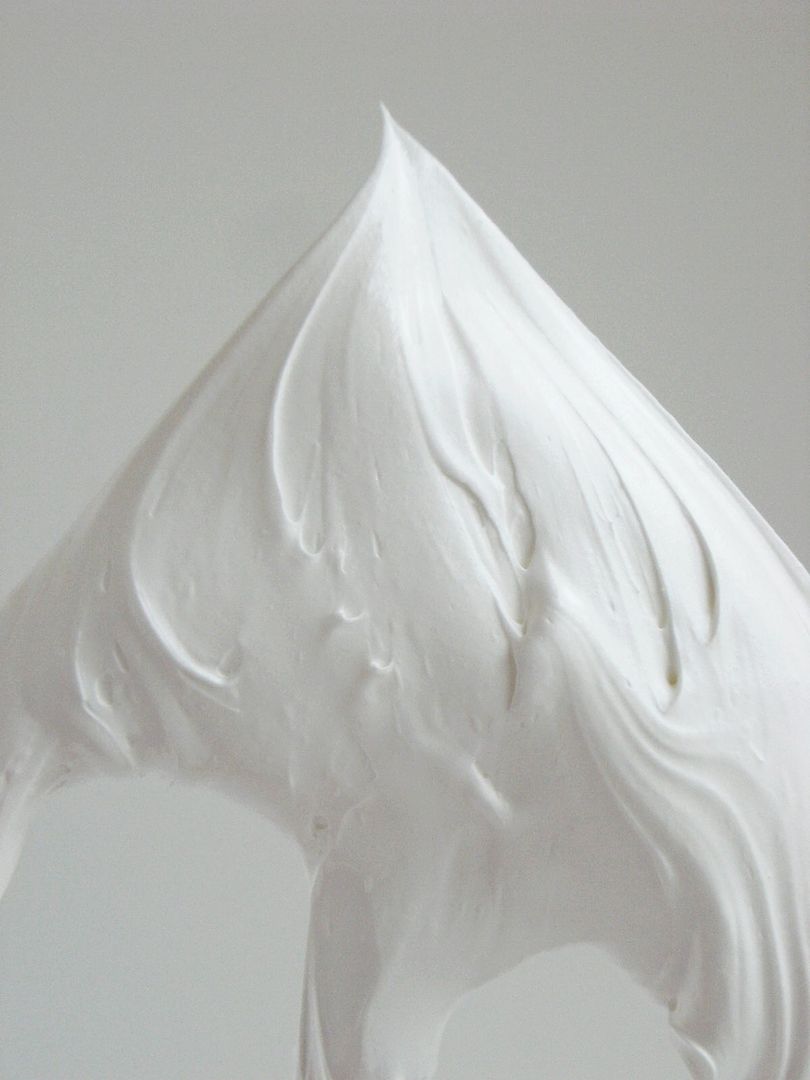
Increase speed to med-high/high and beat for about 5 minutes, just until the icing is glossy and stiff peaks form.

(You should be able to remove the beater from the mixer and hold up and jiggle without the peak falling.) Do not overbeat.

Cover with plastic wrap touching the icing or divide and color using gel paste food colorings.
This "stiff" icing is perfect for outlining and even for building gingerbread houses and monogramming. To fill in your cookies, add water to your icing a teaspoon at a time, stirring with a rubber spatula, until it is the consistency of syrup. This technique of filling a cookie with thinned icing is called "flooding."
She also has some really great tips on her blog.
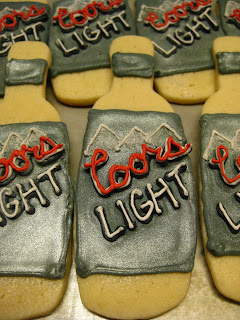
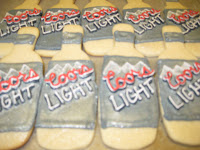
For the beer bottles, I colored thick royal icing gray. Then I outline the label and a band across the neck of the bottle with the gray using a #3 tip. I flooded it with thinned gray icing. I should have dusted the gray here with the silver luster dust, but i forgot about it. Then after I let it set, I piped thick black lettering as it is on the real beer bottle with a #3 tip. Using a #2 tip I went back and piped white over the "Coor's" letters. I used a #1 for the fine lettering in white on the "Light". I used red icing for the very last layer of lettering. For the mountains, I initially piped them on, then took a stiff brush and muddled it up a little then re-piped the mountains. After it was all set and dry, I brushed on the luster dust.
For the beer glasses, I outlined and filled the bottom 3/4 of the glass with a mustard color icing. After that was completely set, I went back to do the white at the top (the head of the beer). I waited to do this so that I could immediately add dusting sugar to the white so that it looked more like foam.
Everyone really loved these cookies. Especially my dad. :-)
- 1 c. {two sticks} of REAL unsalted BUTTER, softened
- 1 1/2 c. confectioner’s sugar
- 1 egg
- 2-3 tsp flavoring {pick what you like, I prefer almond}
- 2 1/2-2 3/4 c. all-purpose flour
- 2 tsp. baking powder
- 1 tsp. salt
I can tell the dough is ready when most of it sticks to the paddle.
When I touch it, it has a little give, but does not stick to my fingers.
Roll out on parchment to about 1/4 an inch thick, use flour for dusting
as necessary. Then, cut and bake at 400 degrees for 7-8 minutes. This
version makes 2-2 1/2 dozen, doubled, it makes 4-5 dozen.
When they are cool, they are ready to decorate.
A few notes about Sweet Sugarbelle's recipe from Sweet Sugarbelle…
- The dough DOES not need to be refrigerated. That’s why I like it.
- The dough needs to rest a little after mixing, it will firm up a little bit after a minute or two
- The recipe doubles well
- Baking times are approximate. You must KNOW your oven. Watch them the first few times you bake them. Get a thermometer, and do not over bake. If the cookies are browning you have gone too far.
- This dough can be flavored any way you like.
- The cookies freeze well
- There is a lot of leavener in these cookies. This is not a typo. The general rule is less leavener so they don’t spead, but I’ve never been one to follow the rules.
- This recipe does spread a little. If you don’t like that add a little flour.
- Speaking of flour, start with 2 1/2 cups. Add another 1/4 of a cup if the dough seems to sticky.
- If you don’t like salt, leave it out altogether.
- If you only have salted butter, use that and reduce the salt.
- I prefer decorating day-old cookies. They are less likely to leach oil back into your icing if they have had a day or two to “dry out”. They are still soft, however.
Anyway, moving on. I found the generic birthday party cutters, but I really wanted something special for my Dad's 60th birthday. So, I went to the local cake store. I found a beer glass, a milk bottle and a wine bottle. The wine bottle turned into a beer bottle with a little icing and the milk bottle turned upside down and into a better beer glass than the real beer glass. (I couldn't find a beer mug.)
The royal icing recipe I found at BakeAt350
Royal Icing
(This will cover 2-3 dozen 3.5 inch cookies in 2 colors; I usually double this recipe.)4 TBSP meringue powder
scant 1/2 c. water
1 lb. powdered sugar
1/2 - 1 tsp light corn syrup
few drops clear extract (optional)

Combine the meringue powder and water. With the paddle attachment of an electric mixer, beat until combined and foamy.
Sift in the powdered sugar and beat on low to combine. (Do NOT skip the sifting!)
Add in the corn syrup and extract if desired. ( I think the corn syrup helps keep the icing shiny.)
Increase speed to med-high/high and beat for about 5 minutes, just until the icing is glossy and stiff peaks form.

(You should be able to remove the beater from the mixer and hold up and jiggle without the peak falling.) Do not overbeat.

Cover with plastic wrap touching the icing or divide and color using gel paste food colorings.
This "stiff" icing is perfect for outlining and even for building gingerbread houses and monogramming. To fill in your cookies, add water to your icing a teaspoon at a time, stirring with a rubber spatula, until it is the consistency of syrup. This technique of filling a cookie with thinned icing is called "flooding."
She also has some really great tips on her blog.
 | |
| Birthday Celebration Cookies |
For the beer bottles, I colored thick royal icing gray. Then I outline the label and a band across the neck of the bottle with the gray using a #3 tip. I flooded it with thinned gray icing. I should have dusted the gray here with the silver luster dust, but i forgot about it. Then after I let it set, I piped thick black lettering as it is on the real beer bottle with a #3 tip. Using a #2 tip I went back and piped white over the "Coor's" letters. I used a #1 for the fine lettering in white on the "Light". I used red icing for the very last layer of lettering. For the mountains, I initially piped them on, then took a stiff brush and muddled it up a little then re-piped the mountains. After it was all set and dry, I brushed on the luster dust.
For the beer glasses, I outlined and filled the bottom 3/4 of the glass with a mustard color icing. After that was completely set, I went back to do the white at the top (the head of the beer). I waited to do this so that I could immediately add dusting sugar to the white so that it looked more like foam.
Everyone really loved these cookies. Especially my dad. :-)
Sunday, November 27, 2011
Pineapple Upside Down Cake and Cupcakes
My wonderful Dad turned 60 on Black Friday.
To celebrate his birthday we had a party, of course. I made Pineapple Upside Down Cupcakes and a Pineapple Upside Down Cake. His favorite!
I am not entirely sure where this recipe came from, other than I got it from mother's recipe box when I got married and moved out. (I am not claiming ownership of this recipe in any way, although I did modify it to make cupcakes.)
Pineapple Upside Down Cake
1/2 cup butter
1/2 cup packed light brown sugar
1 can (8 1/4 oz) sliced pineapple (I used a 15 oz can and ended up using 7 rings and 1 cup of juice)
Maraschino cherries - halved (one half for each ring)
1/2 cup sugar
1 egg
1 tsp vanilla
1 cup unsifted flour
1 1/2 tsp baking powder
1/4 tsp salt
Melt 1/4 cup of butter and mix with the brown sugar. Spread it into an 8 inch square pan (I used a 9 inch round, you could also use a cast iron skillet). Drain the pineapple, reserving the juice, and arrange the slices over the butter/brown sugar mixture. Place cherries in the center of each ring.
Cream the remaining softened 1/4 cup of butter and white sugar. Add the egg and vanilla. Mix until just combined.
Combine flour, baking powder, and salt.
Alternate adding the flour mixture and the reserved pineapple juice (about a cup) to the butter mixture.Beat just until smooth.
Pour evenly over the fruit in the pan.
Bake at 350 for about 40 minutes or until the cake tests done with a toothpick.
Cool in the pan for about 5 minutes on a wire rack, then invert onto a serving plate. Be careful removing the pan so that your fruit doesn't stick to it (it can easily be placed back on the cake if it does).
Pineapple Upside Down Cupcakes
Makes about 24-30 cupcakes
I melted 1/2 cup of butter and mixed with with 1 cup of packed browned sugar. Then, I line muffin tins with grease-proof cupcake liners and evenly spread each on with about 1 1/2 Tbsp of well-drained crushed pineapple. Then I topped each one with about 1/2 Tbsp of the butter/brown sugar mixture.
 |
| YUMMY! |

For the batter, I doubled the recipe above for Pineapple Upside Down Cake. I used the juice from a 15 oz can of crushed pineapple and I omitted the cherries. Add the cake batter to the pineapple in the muffin cups. I filled them to within a 1/4 inch from the top of the pan. Than bake at 350 for about 15-17 minutes. They come out perfect. I did have to make more butter and brown sugar and use more pineapple for the batter that I had, but the juice from one can is all you need for the batter.
I topped them with caramel frosting.
Caramel Frosting
Enough frosting for about 12 cupcakes
1 cup brown sugar
1/2 cup butter
1/4 cup milk
1 tsp vanilla
1 1/2 - 2 cups of powdered sugar
In a small saucepan on the stove, combine brown sugar, butter and milk.
Bring to a boil and cook for 2 minutes until slightly thickened.
Let cool slightly before adding the vanilla.
Gradually add the powdered sugar, add as much or little as you like depending on what consistency you want. (Be aware that this icing with turn to stone once it cools and you have added too much powdered sugar.)
This is where I ventured from the original instructions.
I poured the mixture into the mixing bowl of my stand mixer. I beat on medium until the mixture cooled. Once cooled I had to add a little more milk to thin it out so that I could get it through my piping bag. Add milk or more powdered sugar and beat until it is the consistency you need. It was still soft when I piped it onto the cupcakes but I immediately put them into the fridge to set up and they were wonderful, just not as pretty as a really fluffy icing. However, the FLAVOR makes up for the lack of fluff. These cupcakes are incredible with this icing!
Subscribe to:
Posts (Atom)


